Blog

How to Choose the Right Metal Hole Saw?

Choosing the right Metal Hole Saw can determine whether a drilling job feels controlled or frustrating. The correct tool creates a clean opening, reduces vibration, and protects the workpiece. A poor match may leave jagged edges, overheated teeth, or a damaged pilot drill.

Not every metal behaves the same way. Mild steel, stainless steel, aluminum, and cast iron each respond differently to cutting pressure and heat. Experienced tradespeople usually examine the material thickness, hole diameter, drill speed, and available cutting fluid before selecting a saw. Bi-metal hole saws offer practical durability for many general metalworking tasks. Carbide-grit or carbide-tipped designs may perform better on harder materials, but they often require steadier handling and greater budget consideration.

Small details matter.

A professional evaluation should also consider tooth design, arbor compatibility, cutting depth, and the power of the drill. For example, a 32-millimeter saw cutting thin sheet steel may need different settings than a 32-millimeter saw cutting a thick steel plate. Manufacturer specifications remain essential because appearance alone cannot confirm performance.

However, no selection guide can replace a test cut. Real conditions may differ from workshop assumptions. I have seen a seemingly suitable saw struggle because the drill speed was excessive or the workpiece was poorly supported. That limitation deserves attention. This guide explains how to compare Metal Hole Saw options with practical judgment, safer working habits, and realistic expectations. The goal is not simply to buy the strongest tool, but to choose a reliable match for the material, machine, and job.
How to Choose the Right Metal Hole Saw?

Define the Material, Thickness, and Hole Size

How to Choose the Right Metal Hole Saw?

The correct hole saw starts with the metal, not the package label. In my workshop, I first identify whether the workpiece is mild steel, stainless steel, aluminum, or cast iron. Each material cuts differently. Mild steel usually works well with a bi-metal hole saw and cutting oil. Stainless steel needs steady pressure, low speed, and sharp teeth. Otherwise, heat can harden the surface and stop the teeth from cutting. Aluminum cuts easily, but chips may clog the gullets.

Thickness also changes the choice. A 25 mm hole through 6 mm steel needs less effort than the same hole through a 20 mm plate. Check the saw’s cutting depth and provide space for the slug to exit. For thick metal, pause occasionally and clear chips. Do not force the tool. I once selected a saw by diameter alone, and the teeth overheated before reaching the center. That shortcut was wrong.

Tips: Measure the hole twice. Choose a saw slightly larger only when the fitting requires clearance. Mark the center clearly, clamp the workpiece firmly, and use a pilot drill suited to metal. Slow speed is often safer and cleaner. Watch the chips. Blue chips usually mean excessive heat. A test cut on scrap metal can reveal problems before the finished panel is damaged.

Select the Right Hole Saw Type and Tooth Design

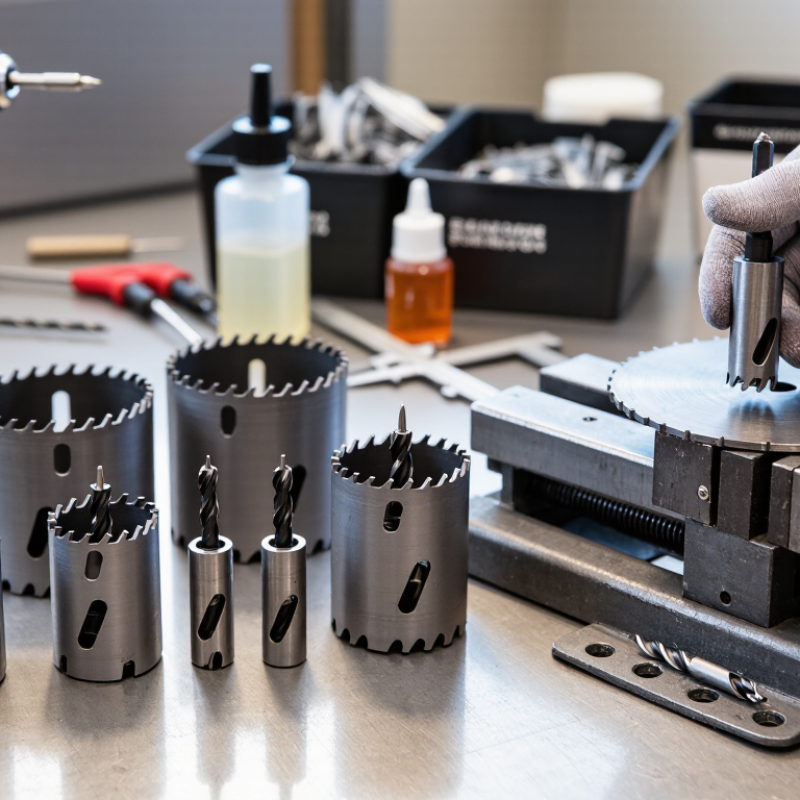
Choosing the right metal hole saw starts with the material, not the hole diameter. In workshop use, I first check whether the workpiece is mild steel, stainless steel, aluminum, or cast iron. Each metal cuts differently. A bi-metal hole saw suits many thin and medium steel sheets. Its flexible teeth resist sudden tooth breakage. Carbide-tipped designs cut harder materials and often last longer, but they need steadier pressure. Diamond-grit models can work on abrasive metals, although they remove material more slowly.

Tooth design controls cutting speed, vibration, and heat. Variable-pitch teeth are useful for general steel because they reduce chatter and spread wear across the cutting edge. Coarse teeth clear chips quickly from thicker stock. Fine teeth usually produce smoother cuts in thin sheet metal. Too many teeth can clog with chips. Too few can catch aggressively. It is a small detail with a big effect.

I once selected a coarse tooth pattern for thin stainless steel and created a rough, overheated opening. The choice was wrong. For stainless steel, moderate pressure, cutting fluid, and a suitable tooth pattern matter more than speed. Keep the drill aligned, clear chips regularly, and avoid forcing the tool. Check the manufacturer’s recommended cutting range when available. Real materials vary, so a short test cut can prevent wasted metal. Personal protective equipment remains essential, especially when sharp chips and hot surfaces are present.

Match the Saw to Your Drill and Cutting Conditions

How to Choose the Right Metal Hole Saw?

Match the hole saw to your drill and the metal in front of you. A powerful drill may still struggle with the wrong cutting setup. Check the arbor size, chuck capacity, and available torque before starting. Thin sheet metal usually needs fine, sharp teeth. Thicker steel often requires a tougher saw with deeper teeth. For stainless steel, controlled speed and steady pressure matter more than brute force. The pilot drill must remain secure, or the saw can wander across the surface.

Tips: Clamp the workpiece firmly. Use cutting oil when suitable. Keep the drill square. Clear chips often. Do not force a dull saw.

Cutting speed should match the hole diameter and material hardness. Larger saws need slower speeds because their teeth travel farther with each rotation. Start gently, then increase pressure only when the teeth engage evenly. I once pushed too hard through mild steel, and the teeth overheated before the hole was complete. That mistake changed my routine. I now check chip color, vibration, and smell during every cut. If the saw chatters, stop and inspect the arbor, pilot bit, and workpiece support. A clean entry, stable drill, and patient feed usually produce a better hole than extra power.

Check Compatibility, Safety Features, and Product Quality

How to Choose the Right Metal Hole Saw?

Compatibility comes before cutting speed. Match the hole saw to the metal, thickness, arbor, and drill chuck. High-carbon steel may accept general-purpose teeth, while stainless steel needs heat-resistant tooth geometry. Check the manufacturer’s recommended speed range, too. An oversized saw on a weak drill can stall suddenly. That is not a small inconvenience.

Safety features deserve equal attention. A pilot drill should hold firmly without excessive wandering. A reinforced arbor can reduce vibration, while clear chip gullets help prevent clogging. Wear eye protection, hearing protection, and suitable work clothing. Keep loose gloves and sleeves away from rotating parts. The U.S. Bureau of Labor Statistics recorded 2.6 million private-industry nonfatal workplace injuries in 2023. A hole saw cannot explain that figure, but poor tool control can add unnecessary exposure. See the BLS Employer-Reported Workplace Injuries and Illnesses report.

Product quality is visible in small details. Inspect tooth spacing, weld consistency, arbor runout, and surface finishing. A clean cut should produce short chips, not glowing fragments. ISO 12100 emphasizes risk reduction through equipment design and user controls. Still, standards do not replace judgment. I sometimes focus too heavily on cutting speed and overlook material thickness. That mistake costs time. Before buying, test one sample cut and inspect the edge, heat marks, and tooth wear. The HSE reported 561,000 non-fatal workplace injuries in Great Britain during 2023/24, reinforcing why controlled tool selection matters.

Plan Proper Cutting, Maintenance, and Replacement Procedures

Choosing the right metal hole saw begins with a cutting plan, not a catalog search. Match the tooth pitch and diameter to the metal thickness. Thin sheet metal needs finer teeth, while thicker steel benefits from a coarser pattern. Check the drill’s speed range, arbor capacity, and available torque before cutting. Keep it simple. A pilot bit should enter squarely, with firm pressure and controlled speed. Cutting oil reduces heat and tooth wear, especially in stainless steel. Do not force a dull saw. I have seen operators increase pressure when the cut slows, only to create heat, vibration, and uneven teeth.

Maintenance should follow every demanding job. Remove chips from the gullets with a brush, then inspect teeth under good lighting. Look for missing tips, rounded edges, cracks, and blue discoloration from overheating. Store the saw dry, with teeth protected from impact. The U.S. Bureau of Labor Statistics reported 2.6 million nonfatal workplace injuries and illnesses in private industry during 2023. Safe cutting habits are not optional details. They support a repeatable process. BLS also recorded 5,283 fatal occupational injuries in 2023, reinforcing the need for controlled tool use and clear procedures. Replace the hole saw when cutting becomes slow despite correct speed, lubrication, and pressure. Replace it immediately after cracks or tooth loss appear. Waiting for complete failure is poor planning. A simple replacement log can record material, hole count, cutting time, and visible wear. The record may be imperfect, but it reveals patterns. Adjust the procedure when evidence demands it.

How to Choose the Right Metal Hole Saw? - Plan Proper Cutting, Maintenance, and Replacement Procedures

Metal Hole Saw Selection, Cutting, Maintenance, and Replacement Guide
Decision or Procedure Recommended Data or Range Suitable Application Cutting Method Maintenance Requirement Replacement Trigger
Hole diameter Common sizes: 19–152 mm (3/4–6 in). Select a saw that matches the finished hole size; allow clearance for the pilot drill and arbor. Electrical conduit, pipe pass-throughs, cable entries, sheet-metal access holes, and fabrication work. Confirm the required hole size before cutting. For large diameters, use a rigid drill or magnetic drill with adequate torque. Keep the saw concentric on the arbor and check that the mounting thread or adapter is fully tightened. Replace the saw if the cutting diameter is no longer within the required tolerance or if the body becomes distorted.
Workpiece material Low-carbon steel, stainless steel, aluminum, brass, copper, cast iron, and plastic require different tooth materials, speeds, and lubricants. Use a general-purpose blade only when its tooth geometry and material are suitable for the workpiece. Identify the material and thickness first. Avoid treating stainless steel like mild steel because excessive speed can cause work hardening. Remove chips and dried cutting fluid after each use to reduce corrosion and tooth damage. Replace the saw when the tooth profile is rounded, chipped, heavily galled, or no longer cuts without excessive force.
Bi-metal hole saw High-speed-steel cutting edge welded to a flexible alloy-steel body; commonly available with variable-pitch teeth. Mild steel, galvanized steel, stainless steel, aluminum, copper, brass, wood, and composite materials when the manufacturer permits. Use moderate pressure, steady feed, and cutting fluid for metals. Variable-pitch teeth help reduce vibration and snagging. Clean the gullets with a brush and inspect the weld area, teeth, and sidewall for cracks. Replace when multiple teeth are missing, the rim is cracked, or cutting becomes slow despite correct speed and lubrication.
Carbide-tipped hole saw Carbide teeth provide higher wear resistance than standard high-speed-steel teeth but are more vulnerable to impact and misalignment. Stainless steel, cast iron, hard steel, abrasive sheet materials, and applications requiring longer wear life. Use a rigid setup and controlled feed. Do not rock the tool or force it through the final wall section. Inspect each carbide tip for cracks or missing segments. Store separately to prevent edge impact. Replace immediately if a carbide tip is cracked, loosened, or missing, even when the remaining teeth appear sharp.
Tooth pitch Variable pitch is generally preferred for mixed metal thicknesses and vibration control; finer pitch suits thinner sheet, while coarser pitch suits thicker sections. Thin sheet metal, structural steel, tubing, and fabrication assemblies. Choose a pitch that allows at least two to three teeth to engage the material during cutting whenever practical. Clear packed chips from the gullets. Chip packing increases heat, friction, and the risk of tooth stripping. Replace the saw if the teeth have become uneven, hooked, polished, or unable to clear chips effectively.
Material thickness Check the saw's rated cutting depth. Many standard hole saws are designed for thin sheet and tubing, while deep-cut models are required for thicker stock. Sheet metal, box section, pipe, tube, plate, and laminated assemblies. Clamp the work securely. For thick material, withdraw the saw periodically to clear chips and renew lubricant. Check the inside wall for chip scoring and confirm that the slug can exit without binding. Replace or change to a deeper model when the saw bottoms out before completing the hole.
Recommended cutting speed Use the tool maker's speed chart. As a general starting point for a 25–50 mm saw: mild steel about 70–150 rpm; stainless steel about 30–80 rpm; aluminum about 150–300 rpm. Portable drills, drill presses, and magnetic drills with variable-speed control. Start at the low end of the range, especially for stainless steel or large diameters. Reduce speed as diameter increases. Record the successful speed and feed settings for repeat work. Keep the spindle and arbor free from runout. Do not replace the saw solely because of slow cutting until speed, feed, lubrication, and alignment have been checked.
Speed calculation Spindle speed in rpm ≈ cutting speed in m/min × 1,000 ÷ (π × saw diameter in mm). Planning repeatable work when a recommended surface-speed range is available. Example: at 25 m/min with a 50 mm saw, speed is approximately 159 rpm. Round down to the nearest available machine setting. Verify actual machine speed where possible; overloaded drills may run below their rated speed. Investigate the machine or setup if speed fluctuates substantially under normal cutting load.
Pilot drill Use a sharp pilot drill correctly matched to the arbor. A common pilot diameter is approximately 6–8 mm, but arbor specifications take priority. Starting holes accurately in sheet, tube, and plate. Mark the center, use a center punch where appropriate, and begin with light pressure until the pilot drill is fully engaged. Replace or sharpen the pilot drill when it wanders, overheats, or produces a rough entry hole. Replace it when the cutting lips are chipped, blunt, uneven, or smaller than the arbor specification requires.
Lubrication Use a suitable cutting oil or metalworking fluid for steel and stainless steel. Aluminum commonly benefits from a non-staining, aluminum-compatible lubricant. Metal cutting where heat, friction, and chip welding must be controlled. Apply enough fluid to wet the cutting edge; reapply during long cuts. Do not flood electrical tools unless the equipment is designed for it. Wipe off residue after use and store the saw dry. Follow the fluid safety data and ventilation requirements. Replace the saw if heat discoloration is accompanied by soft, rounded, or severely galled teeth.
Workholding and alignment Secure the workpiece with clamps, a vise, or a properly mounted fixture. Keep the drill perpendicular to the surface. Thin sheet, tubing, plate, and portable drilling operations. Prevent the workpiece from spinning. Use a guide or pilot hole when the surface is curved or difficult to position. Inspect the arbor, chuck, and pilot assembly for runout, looseness, or damaged threads. Replace the arbor or saw if runout causes visible wobble, uneven tooth wear, or an oversized hole.
Feed pressure Apply firm, even pressure sufficient to produce chips without stalling the tool or bending the saw body. All metal cutting operations, particularly stainless steel and thin sheet. Do not force a dull saw. Excessive pressure can strip teeth, deform thin sheet, or overload the drill. Monitor chips, noise, vibration, and heat. Blue chips or smoke indicate excessive heat or an unsuitable cutting condition. Replace the saw when normal pressure no longer produces chips and the cutting edge is visibly worn.
Breakthrough control Slow the feed when the saw is close to completing the cut, especially on thin sheet or unsupported material. Preventing snagging, slug impact, edge breakout, and workpiece deformation. Support the exit side when practical and release pressure as the final section separates. Remove the slug with pliers after the tool stops. Never pull a rotating saw away from the workpiece. Replace the saw if breakthrough repeatedly causes tooth loss because of a damaged or distorted rim.
Cleaning after use Remove chips with a brush or suitable compressed-air procedure; do not use bare hands to clear sharp swarf. Every cutting operation, especially when cutting stainless steel or abrasive materials. Stop and isolate the machine before cleaning the saw, arbor, or workpiece. Brush the gullets, wipe the body, dry the tool, and apply a light rust-preventive coating when appropriate. Replace the saw if cleaning reveals cracks, missing teeth, severe corrosion, or a loose cutting segment.
Inspection interval Inspect before every use; perform a more detailed check after heavy, overheated, or interrupted cuts. Workshops, maintenance teams, fabrication operations, and repeat production. Check tooth condition, pilot drill sharpness, arbor fit, body roundness, and signs of overheating. Keep inspection records for frequently used sizes and applications. Remove the tool from service immediately when structural damage or unsafe mounting is found.
Storage Store dry, protected from impact, and separated by size or type. Keep carbide teeth from contacting hard surfaces. Maintaining cutting accuracy and extending service life between jobs. Do not leave the saw mounted in a drill where it can be dropped or struck during storage. Use a case, rack, or individual protective sleeve. Keep cutting fluids and corrosive chemicals away from unprotected tools. Replace the saw if corrosion has created deep pitting, weakened the body, or damaged the tooth attachment.
Safe replacement procedure Disconnect power, allow the tool to cool, remove the slug, and use the correct arbor key or wrench. Routine replacement of worn hole saws, pilot drills, and arbors. Install the replacement firmly, verify compatibility, rotate by hand to check clearance, and test at low speed. Confirm that the new saw is centered and that the pilot drill projects the required distance beyond the teeth. Replace before failure when tooth wear, heat generation, vibration, or cut quality indicates the end of useful service.
Practical note: Cutting speeds and tool ratings are starting points rather than universal limits. Always prioritize the specific hole-saw and machine manufacturer's instructions, the workpiece material, the saw diameter, and the actual cutting conditions.

Article Source: